
Perspective drawing is hard to teach because students have to imagine vanishing points on a flat page. For the Ministry of Education’s booth at the 17th Conference of Commonwealth Education Ministers, we built an AR tool that lets students hold a kampung house in their hands and see 1, 2 and 3-point perspective for themselves. It was delivered in about a week.
Client: MMU Cnergy
Event: 17th Conference of Commonwealth Education Ministers (17CCEM), Ministry of Education booth, Centre of Active Learning
Users: Art students, art teachers and conference delegates
Services: AR development
Year: 2009
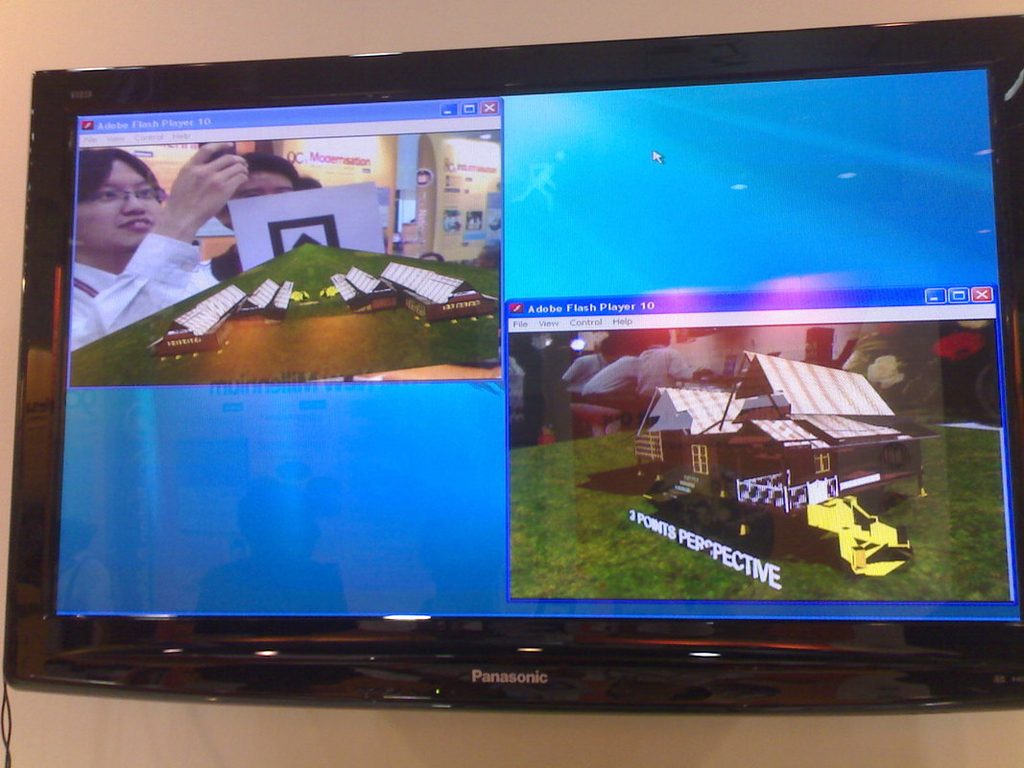
Delivered: A marker-based AR experience with three 3D kampung house models, one each for 1, 2 and 3-point perspective. Built in about one week.
Tech: FLARToolkit on Adobe Flash
Collaboration: Built with MMU Cnergy. The 3D kampung house was modelled by a friend and collaborator.
The situation
MMU Cnergy needed an augmented reality experience for the Ministry of Education’s booth at 17CCEM, a gathering of education ministers from across the Commonwealth. The booth was the Centre of Active Learning, so the AR had to show what active learning could look like, not just look impressive.
The conference date was fixed, and the time available to build it was about a week.
The teaching problem
One of the hardest things to explain in art class is the difference between 1, 2 and 3-point perspective. On paper, a student has to picture the vanishing points and imagine how the same building would look from three different positions. A diagram can only show one view at a time.
We chose a subject every Malaysian student recognises: a kampung house.
What we built
01
One marker, one perspective
Each 3D model has its own printed marker. Show a marker to the camera and the kampung house appears in that perspective.
02
Perspective through deformation
We skewed the house with a 3x3x3 free-form deformation lattice to produce true 1, 2 and 3-point perspective, so the vanishing points are built into the model itself.
03
Something students can hold
Students can hold the three markers side by side, tilt them and swap between them, comparing how the lines converge in each.
The hard part: one week, and Flash
At the time, Adobe Flash was the only practical option for browser-based AR, and Unity AR did not exist yet. We used FLARToolkit, the Flash port of the ARToolKit marker-tracking library, which was still a young and rough toolchain.
The work was split cleanly: a friend modelled the kampung house, while the AR application and the perspective deformation system were built in parallel. With a ministerial conference on a fixed date, there was no room for a second attempt, so the scope was kept tight: one clear idea, three markers, and a demo that worked every time.
The result
The AR was delivered in time for 17CCEM and shown at the Ministry of Education’s Centre of Active Learning booth. Visitors stopped to try it, and art teachers described it as a good teaching tool.
What this shows
Good AR starts with a concept that is hard to teach any other way. Here, the technology is not the point: it makes an invisible idea, vanishing points, something a student can pick up and turn around. Choosing one clear idea and finishing it is also what makes a one-week deadline achievable.
Have an AR idea and a tight deadline?
Tell us what you want people to understand or experience, and we’ll help you find the simplest AR that gets it across. Start with a free assessment.